COLORING USING CLEAN-STYLE
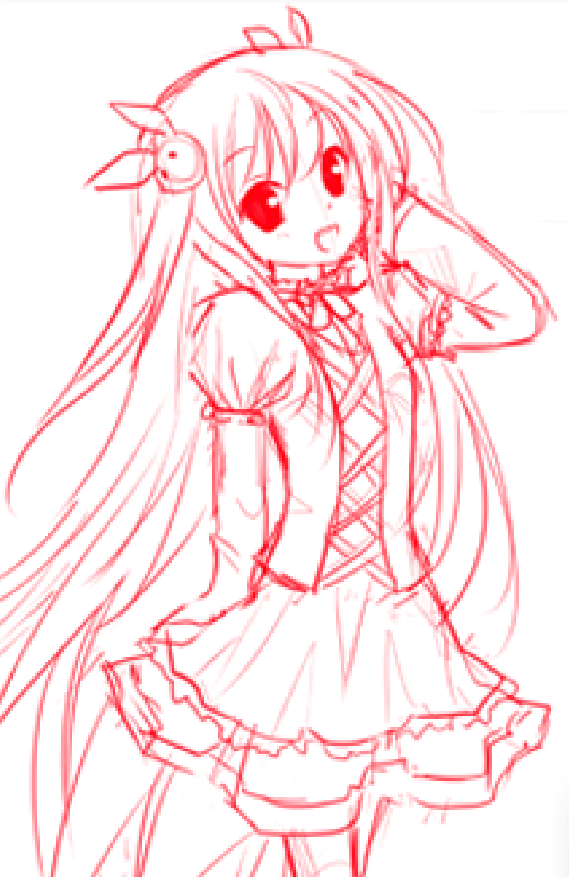
⟵ ⟵ ⟵ ⟵ Before starting the CG, or with the lineart itself you need to do the rough sketch first. It's all up to you on how detailed you want the sketch to be.
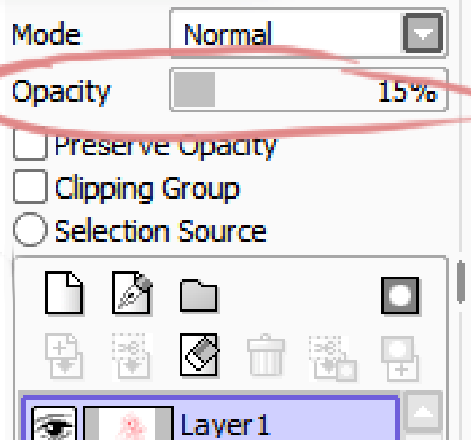
After finishing the sketch, lower its opacity to around 10-20% and make another layer above it. Lowering the opacity will avoid confusion to the artist. ⟶ ⟶ ⟶
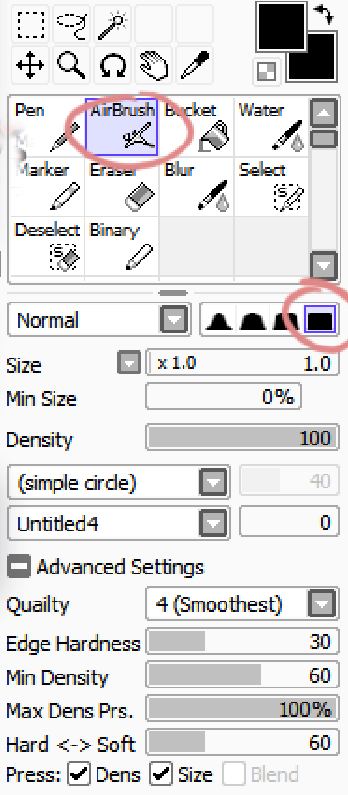
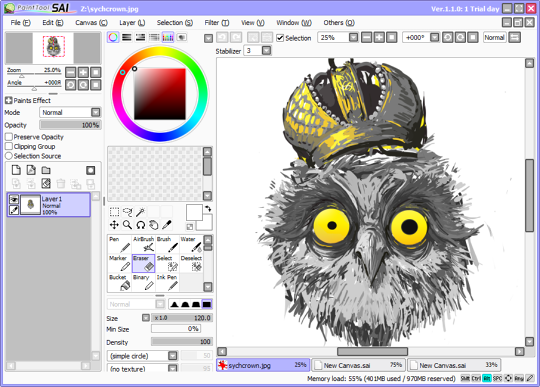
⟵ ⟵ ⟵ ⟵ In doing the lineart. make sure that your brush settings are already set at a comfortable setting. As you can see these are the settings I've used for my brush for this piece. In doing lineart, you should always use the "square brush" option, not the rounded ones.
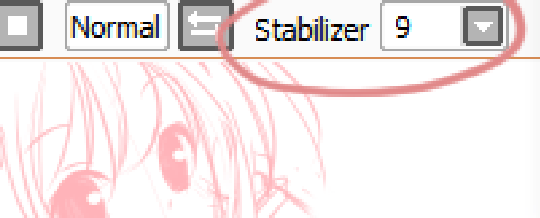
You might also want to change pen stabilizer to a good level. This is important because it will either make you do the linear! faster and more accurately or slower andless accurately.
You're probably wondering why I use the airbrush for inking. I really don't have a sensible explanation for that since I just became comfortable with using the airbrush tool after a lot of practice with this software.
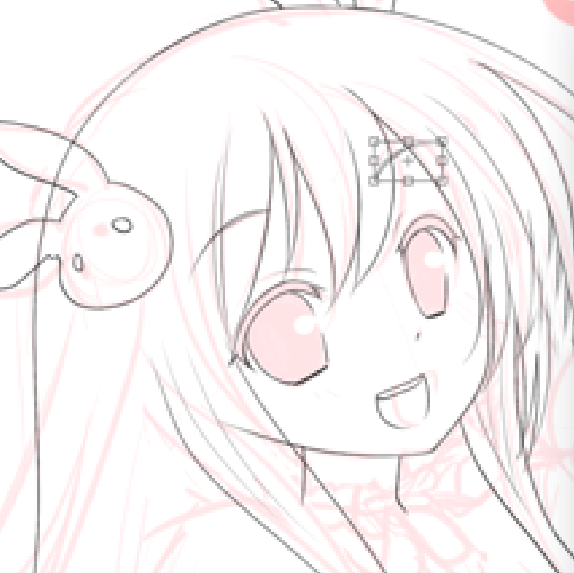
I usually use around 3-4 layers when drawing my lineart. These would be the base, hair, and clothing layers. Having many layers when doing lineart is convenient because I can easily edit some parts of the drawing without touching other parts. You should also occasionally turn off the sketch layer to check on what the actual lineart looks like.
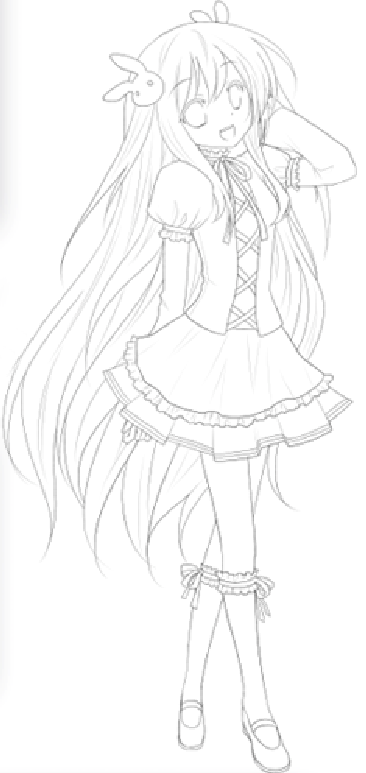
Lineart finished Before proceeding to coloring, check your lineart if there are some gaps and cover them so that It'll be easier to fill entire portions using paint bucket tool. ⟶ ⟶ ⟶ ⟶

I do base colors on every part before doing shading and I usually fill in the skin first. If you're wondering why it's so dark, it's because I want to see whether there are blank gaps left when I used the paint bucket tool. Blank gaps are a very common and annoying problem faced by most people who've been doing CG art...
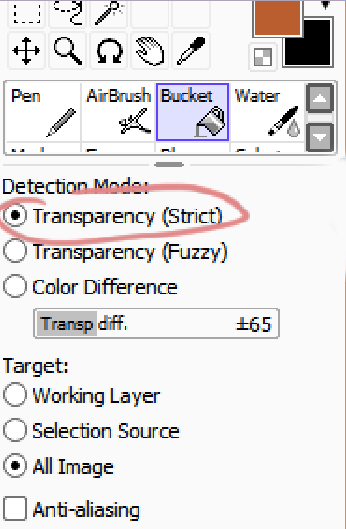
In using the paint bucket tool. I use these settings. Filling should always be for ALL IMAGE so that it will detect every layer filled with opaque pixels. Transp. diff setting will differ according to how thick the lineart is. The thicker the easier to use paint bucket tool since you can put in higher transp. diff and avoid more blank gaps. ⟶ ⟶ ⟶ ⟶
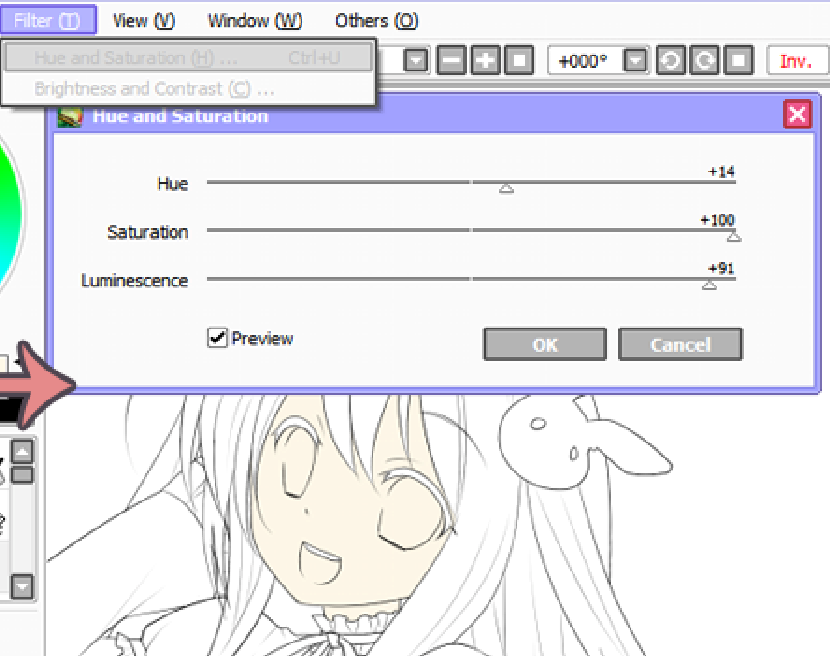
After filling-in all the skin with the dark color, just use Filter ⟶ Hue and Saturation to adjust to the desired skin color. I repeat these steps with every light-toned colors I fill.
This is not really mandatory but it would be more convenient to put layers inside folders. I use more than 10 layers in each CG I make and it‘s very frustrating to try finding a layer in a sea of layers every time I want to edit something in a certain layer. ⟶ ⟶
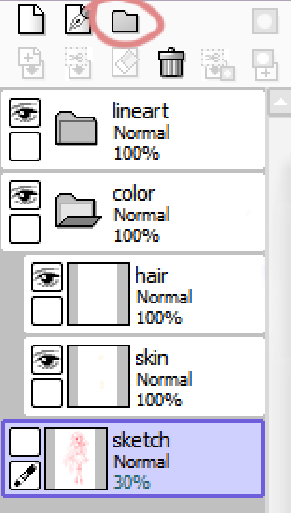
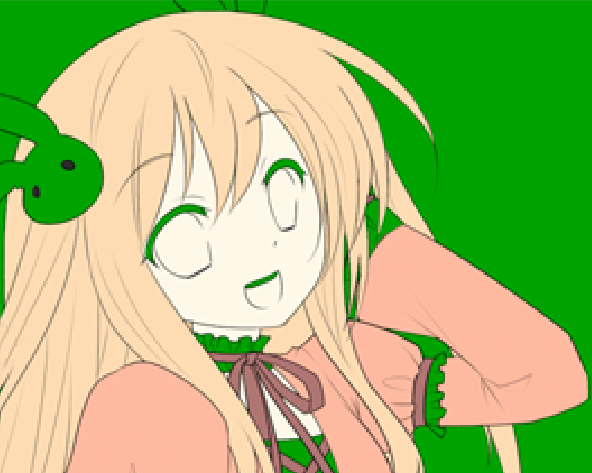
Sometimes I lose track of which layers I've already colored so I make a designated layer and fill it with color using "Working Layer" setting for the paint bucket tool. You don't have to use green. I just used green because I didn't use any green for this piece and it'd be easier to spot blank spaces since there is no similar hue to the color I used to check on the transparent objects.
Base colors done. Let's proceed to putting lights and shades. Probably the most tricky part of coloring.
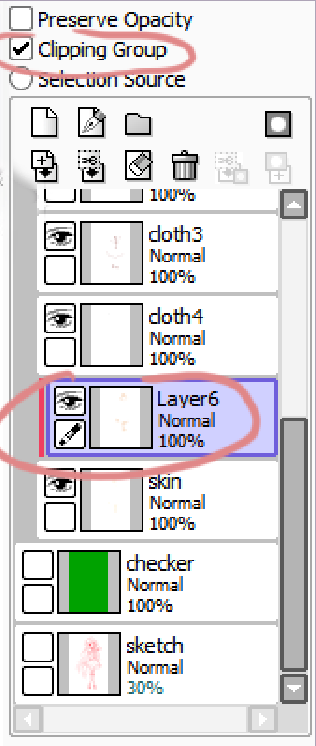
Behold the Clipping Mask. One of the most reliable features of any art software. It lets you "clip" your current layer to every visible pixel including the opacity of the layer below. There should be at least one clipping mask for lights and shades on every base color layers. In doing the shading. I still do to the skin first but it's up to you which part you want to do first.
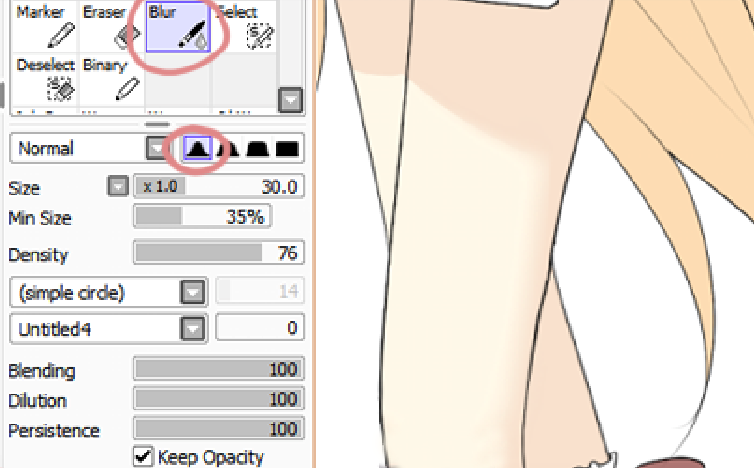
Use cel-shading to do the base shades. After that, use the blur tool to blur out parts with lesser sharp contrasts such as smooth areas like the thighs.
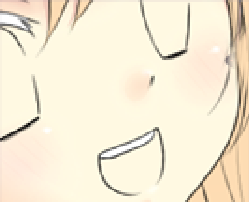
Don't forget to add blush-ons. This gives her a moe-moe effect. Girls also look cuter if they have blushy cheeks.
Also use cel-shading for the clothing then blur out the "less-contrast" areas.
Cel-shading the clothing gives it a more fabric-like feel because of the effects of the crease shadows... I usually use 3 clipping layers for each base colors. These are the basic shade, darker shade, and highlights.

With the hair, I also used the same technique. Though it's a bit different since I can do the shades more freely than when doing the shades on the skin and clothing where your subject is a non-flowing piece of matter which is singular and rigid compared to hair.
Moving back to the face, color the eyelids and mouth using whatever way you want it done since it's not a particularly tedious and difficult part of CGing.
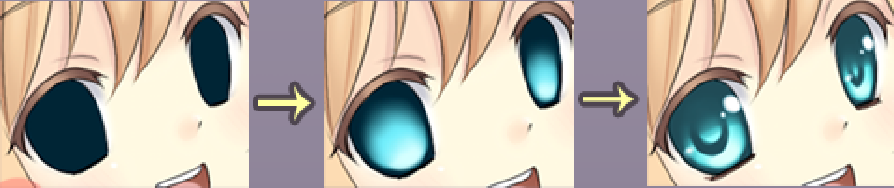
Now let s color the eyes. Coloring the eyes is probably one of the most anticipated part of coloring... Start of by filling it with a really dark tone of the eye color, add a new clipping layer then use low-opacity airbrush to color two lighter tones on the lower part.
After that, draw the "eye ring" then put in eye highlights, and viola- you're done.
If you want to add more highlights andstuff, please don't hesitate to do so. There's no
limit to coloring the eyes.
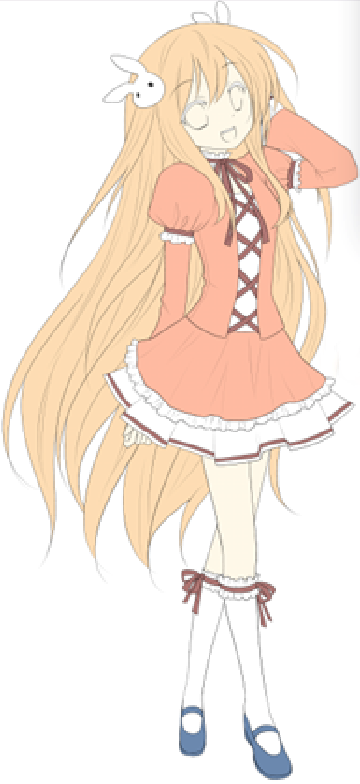
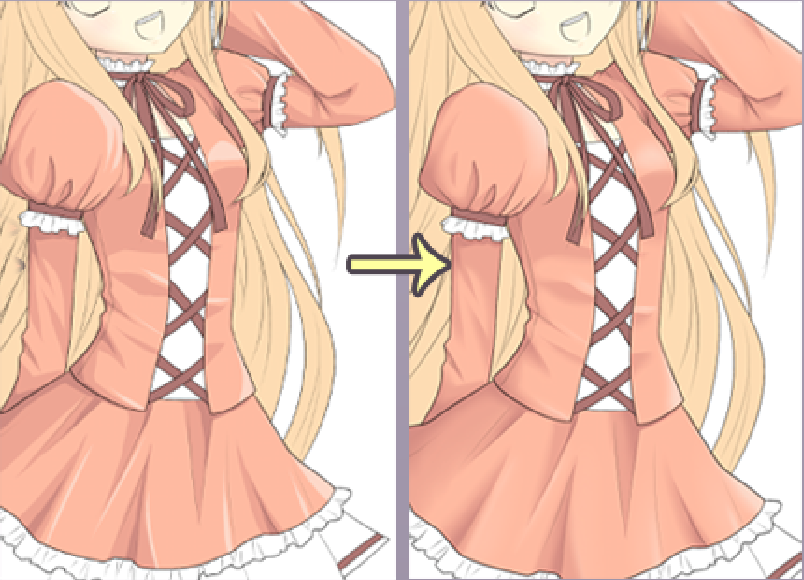
After finishing the coloring, shading and highlighting on each parts, do some shading and highlighting on the entire drawing. It may be subtle but it helps greatly in achieving the visual effect that you want to portray...
What you do is make a new clipping layer on the colors folder then use a low opacity brush to make shades of purple below then tints of yellow above. This gives a realistic atmospheric effect to the piece. Don't forget to lower the opacity of the layer since you only want it to be subtle and not too overpowering.
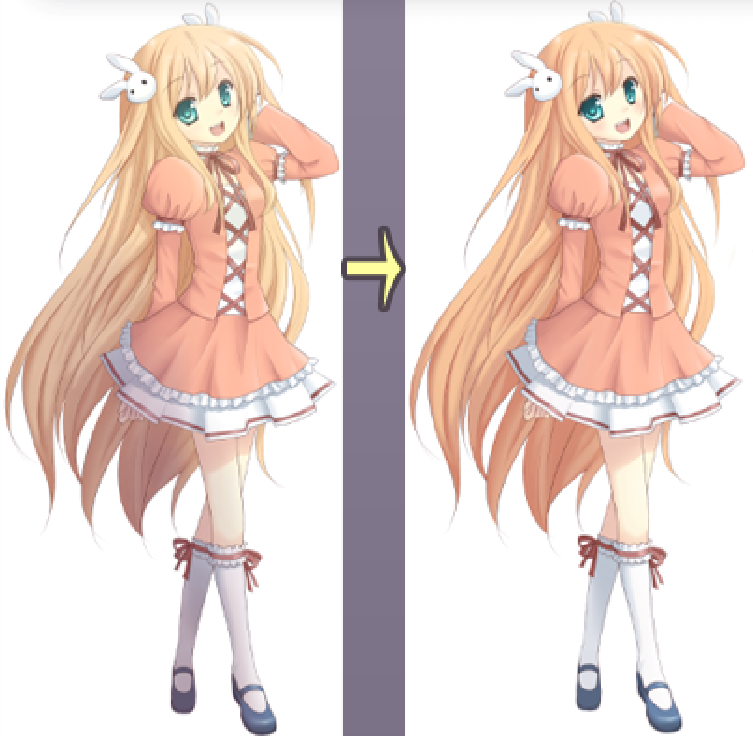
And there you have it! Doing clean CG isn't as hard as you probably think. I also used to think that it's more tedious than how I am doing it but I figured out it was actually easier than I thought... For best results, save your file as .png and with transparent background (32bpp ARG9). Don't be afraid to tweak your drawing with image editing softwares especially Photoshop.